
Welcome to HDR Photo Tutorial
In this tutorial you will learn how to take and edit HDR photographs using Adobe Lightroom and Photoshop. For you to accomplish this tutorial, you will need the following materials:
 DSLR Camera (Canon)
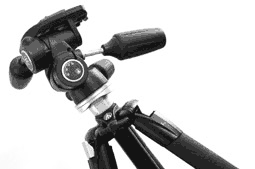
- Tripod
- Remote Shutter Release
- Adobe Lightroom and Photoshop CS6 Installed
Key assumptions
The user will have knowledge in:
- How to use their camera in manual mode
- Change and set different exposure
- Understand how to use a remote shutter release
Step one, location and AEB
Choose the location, this could be the most important step. If you don’t have good photos to work with, the final result may not be satisfactory. Once you have the location, visit it at two or three different hours in a day in order to see the type of light that you prefer to work with. From my personal experience, I prefer to take pictures during sunset or sunrise. If you choose one of these remember to check the weather for the time of the sunrise or sunset.
Once you have selected the perfect location, you will need to set up your camera, please follow the next directions:
 Select “ON” in the “Main Dial” to switch on the camera
- Press the “MENU” button to bring up the menu
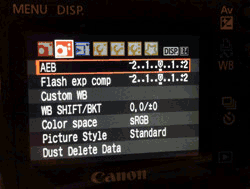
- Under the second red camera icon, select “Expo comp/AEB”, then press the “SET” button
- Turn the “Main Dial” to set the AEB amount
- Press the “Cross Keys” to set the exposure compensation amount and press “Set” to set it
- Focus and press the shutter button using the remote shutter release
- Now select quality in RAW (.cr2)
Now put the camera your camera in the tripod, take some pictures and have fun.
Step Two, Import to Lightroom
Open Adobe Lightroom and load in your stack of photos. To do this, go to library and click on “import”, then search and select your stack of photos (.cr2) previously taken. Click on the “Develop” option at the right top corner.
Now it is time to make a basic edition to these photos. To do so, select the first photo and go to the “basic” panel that is on the right. Adjust “clarity” and turn up the “clarity” to thirty. Then go to the “lens corrections” and check the box “enable profile corrections”. Next, apply the same settings to the rest of the photos. To do this, press the “shift key” and click on the first and then in the last image, to select all of the pictures. Click on “Sync…” and check “clarity” and “enable profile corrections” then click “Synchronize”.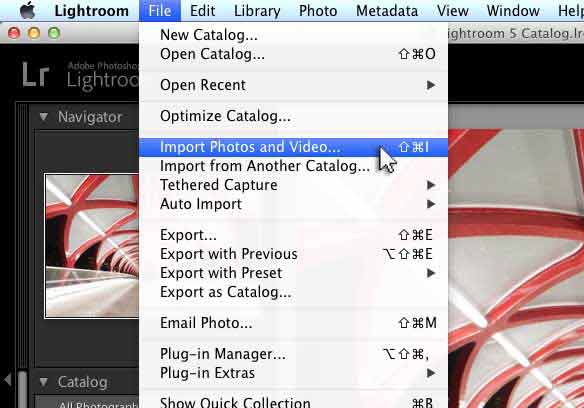
Step Three, Photoshop
Now it’s time to merge all images into one. To make this happen, select all photos that you just edited, right click on one of the photos and go to “edit in”, “merge to HDR pro in Photoshop…” This will open Adobe Photoshop. What will happens next? Photoshop will process all of the pictures, be patient. After a while, you will see the “merge HDR Pro” window and your photo is going to look bad. Don’t worry about the photo, as you will adjust it in Lightroom.
Now select “32bit” in “mode” and check “remove ghosts”. Make sure that “complete toning in adobe camera raw” is not checked, because you will do that in Lightroom. Now adjust the “white point preview” all way to the right and press “ok”.
The reason why we are not going to work in Photoshop is because Photoshop cannot read 32bit TIF files, but Adobe Lightroom happily does. Now close Photoshop and save it. Photoshop will save the image and it will open in Lightroom automatically.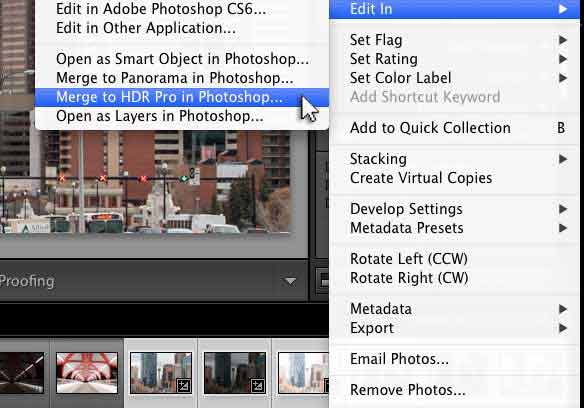


 Design by:
Alberto Tolentino-Pineda
Multimedia Designer
tolentinopineda@gmail.com
Copyright © 2024 - Albertotolentino.com